Gameplay
How a turn works, the clock, deviation, workers, mastery and the rooster's call.
Overview
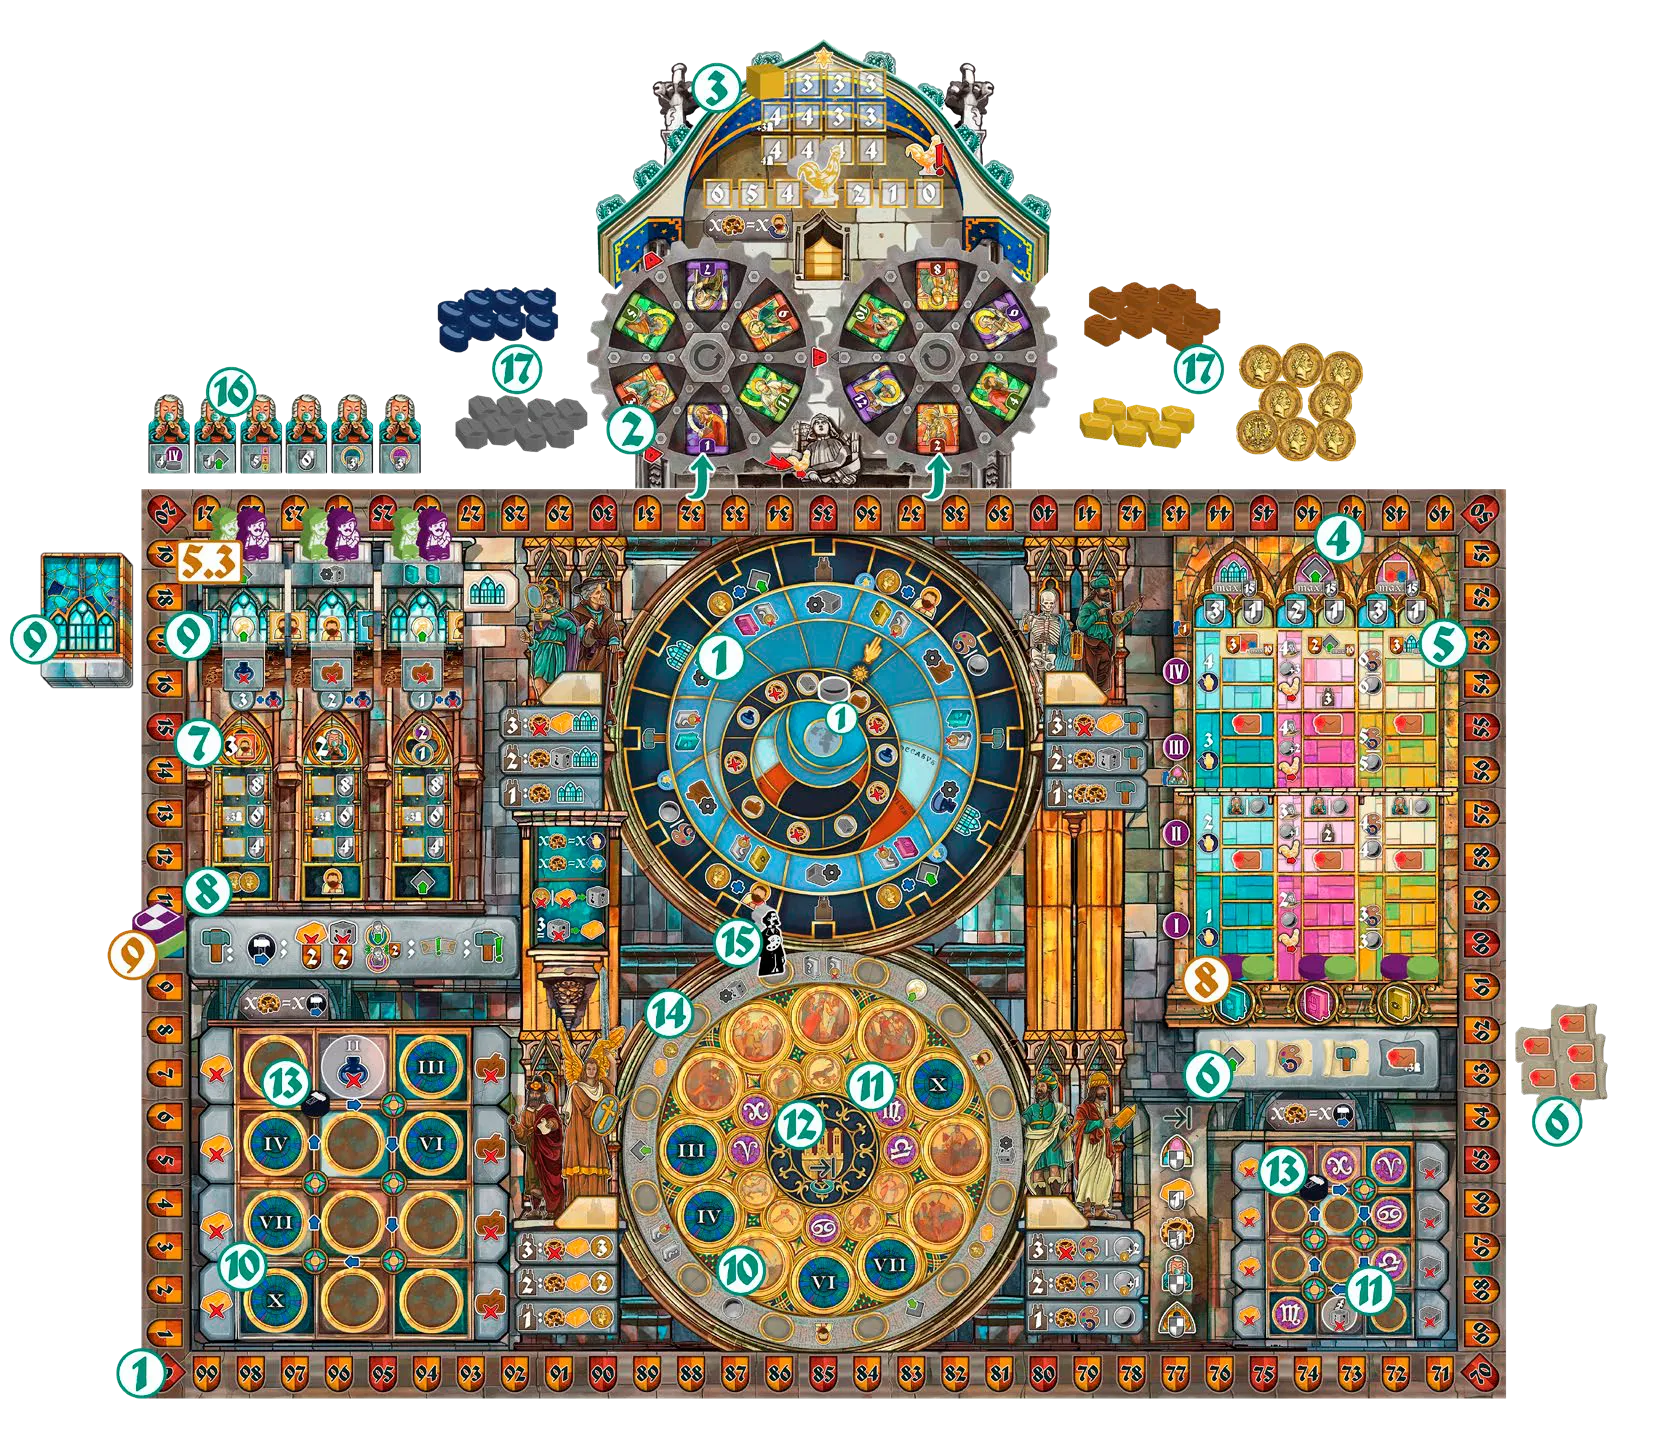
It is 1865 in Prague. Josef Mánes has just painted the calendar of the Old Town’s astronomical clock and the moving apostles are being added. Each of you runs a workshop that builds pieces of the Orloj: the month and zodiac dials of the calendar and the figures of the apostles. Whoever has the most victory points (VP) at the end wins.
Points come in two kinds:
- Immediate — move your marker on the scoring track right away.
- End of game — counted only during the final scoring.
If your marker passes 100, flip it to show the extra hundred.
Game flow
The starting player takes the first turn, then play goes clockwise, one turn each, until the game ends. There are no phases: everything happens inside your turn.
The turn
On your turn you do exactly one of two things:
- Activate the clock — turn the dials, place a worker and take actions, or
- Pass — get workers back and wake the moon.
Either way, you may also take any number of additional actions at any moment of your turn — before, after, or in the middle of another action, and even when you pass. Nothing is mandatory: if you can’t or don’t want to do part of an action, skip it.
Activating the clock
You need at least one available worker to choose this.
The three rings
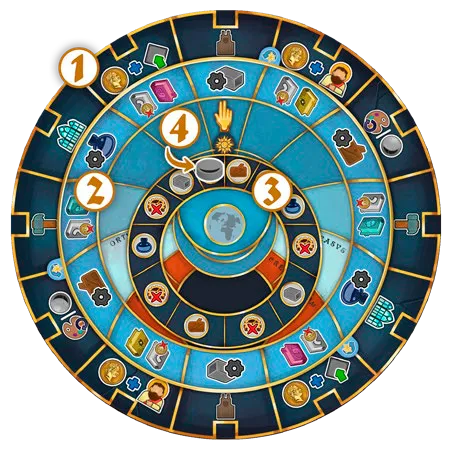
- Outer ring — printed on the board; it never moves.
- Orloj clock face — the middle ring; it only ever turns counterclockwise.
- Astronomical dial — the inner ring with the hand; it only ever turns clockwise. The
 moon rides on it.
The hand points at one section of the outer ring and one section of the clock face: those are the two groups of actions you get this turn.
Rotating the dials
- Turn the astronomical dial clockwise by at least 1 space. Your blue (Innovation) mastery
level is how far you may turn it for free; each extra space costs one forced deviation
 .
. - You may also turn the clock face counterclockwise. It is never free: each space costs one forced deviation.
The two rings are independent — turning one never moves the other.
Placing your worker
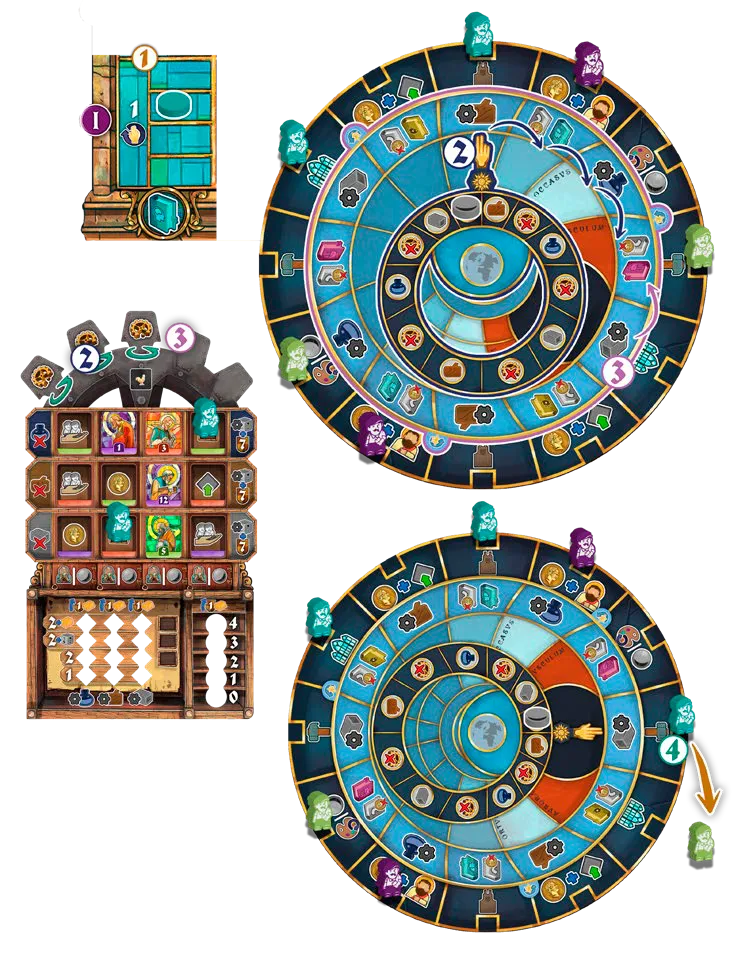
Put an available  worker on the space the hand points at. If a worker is already
there, it goes back to its owner (that includes your own). Then resolve the outer-ring section and
the clock-face section in the order you like — but finish one before starting the other.
worker on the space the hand points at. If a worker is already
there, it goes back to its owner (that includes your own). Then resolve the outer-ring section and
the clock-face section in the order you like — but finish one before starting the other.
Passing
You may pass even with workers left. Passing has three steps:
- Recover workers — up to the number shown by your pink (Precision) mastery level.
- Activate the moon (see the moon).
- Move the golden rooster one space right on the general rooster track.
Additional actions are still allowed during a passing turn.
Deviation
Sometimes you force the mechanism past its limits and fix it later. You have 5 deviation tokens.
- Force — flip a token to its broken-gear side. If all five already show the
broken gear, you cannot force any more.
 Correct — flip a broken token back.
When a force icon appears next to an action, you must pay it before doing the action. Forcing buys extra astronomical-dial spaces, clock-face turns, extra apostle-gear turns, extra hammer moves and some sculptor actions. Every broken gear still showing costs 1 VP at each rooster’s call and again at the end of the game. The moon is the most efficient way to correct deviations.
Workers
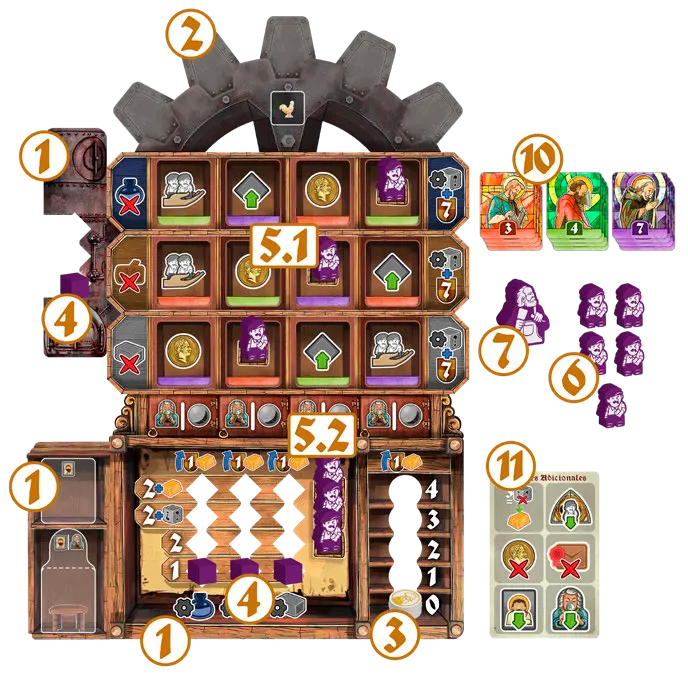
With no available worker you can’t activate the clock: you must pass, or free a worker with an additional action first.
Recovering workers
“Recover” means taking workers back from the clock or the calendar and making them available again. Normally you take them from the clock.
Unlocking workers
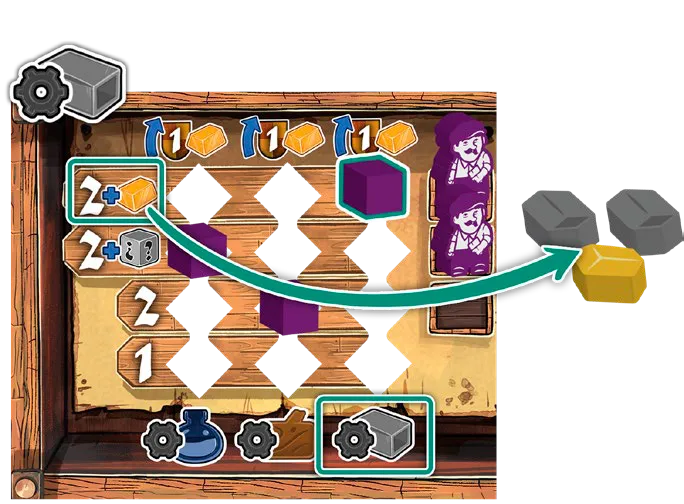
You gain new workers in three ways:
- Apostle panel — placing an apostle on a space that holds a worker frees it.
- Workshop cards — the first time you buy a card in a given position, take your worker waiting above it.
- Production zone — once all three production cubes reach a worker’s row, that worker is yours.
Resources
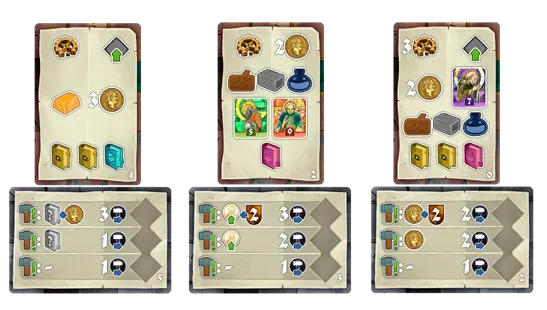
- Basic resources:
 paint,
  wood and
  iron. The
 icon means any one of the three.
 - Special resources:
 gold and
  coins. Either can be paid instead of any
basic resource, but never instead of each other.
coins. Either can be paid instead of any
basic resource, but never instead of each other. - At any time on your turn you may trade 3 identical basic resources for 1 gold.
A resource icon means “take it from the supply”; the same icon crossed out is a cost.
Mastery tracks
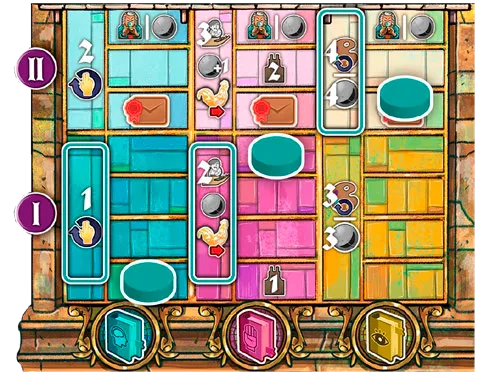
Each player has a disc on three mastery tracks:
| Track | It sets |
|---|---|
| Innovation (blue) | how far you may turn the astronomical dial without deviating |
| Precision (pink) | how many workers you recover when passing, and your sculptor’s level |
| Observation (yellow) | how far the painter can move and how many steps the moon takes |
Bonuses printed on the tracks are described under Mastery.
Warehouse
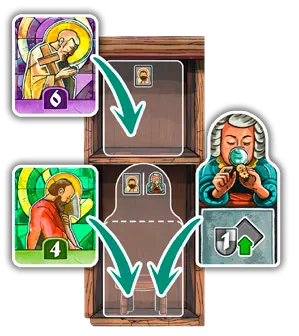
New apostles and assistants arrive in your warehouse before you place them. It has two spaces: one only for an apostle, the other for an apostle or an assistant. Rearrange them whenever you like. With a full warehouse you can’t take another apostle or assistant.
The rooster’s call
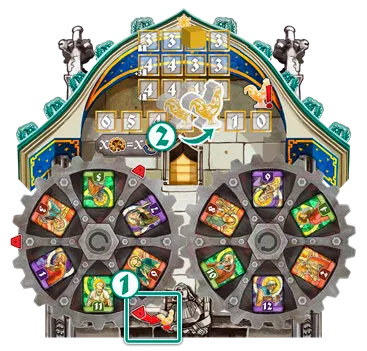
The golden  rooster only moves to the right, and only for two reasons:
- whenever a red tooth of the left apostle gear lines up with the red arrow, and
- whenever a player passes.
When the rooster reaches the last space, the player whose turn it is takes it as a reminder and finishes their turn (further rooster steps that turn are ignored). Then:
- Everyone corrects as many deviations as their personal rooster track shows. Each correction you can’t use — because you have fewer broken gears — earns 1 VP.
- Everyone loses 1 VP per broken gear still showing.
- The round marker moves one space right and the rooster goes back to the number it now shows.
End of the game

The game ends after the round in which the last calendar dial is built, or after the round in which the fourth rooster’s call happens — whichever comes first. Finish the round so everyone has had the same number of turns, then do the final scoring.
Highest score wins. Ties go to the player with the most apostles placed on their panel; if still tied, the victory is shared.